This lab is perhaps the most challenging lab session of the course. You will be learning many new topics and covering a lot of material.
Please don't be stressed. If you get stuck, simply ask for help.
Practice for Week 4
This lab is perhaps the most challenging lab session of the course. You will be learning many new topics and covering a lot of material.
Please don't be stressed. If you get stuck, simply ask for help.
JavaServer Faces (JSF) is an Model-View-Controller (MVC) framework.
JSF has its own Front-Controller Servlet. When you use JSF, you implement the following:
The purpose of this first exercise is become familiar with a JavaServer Faces project.
Create a new project named Week4:
In the "Web Pages" (or "web") folder, there is a file called index.xhtml. This is a view defined using Facelets. If you open the file, you will see it is an XML / XHTML file containing a greeting:
<?xml version='1.0' encoding='UTF-8' ?>
<!DOCTYPE html PUBLIC "-//W3C//DTD XHTML 1.0 Transitional//EN" "http://www.w3.org/TR/xhtml1/DTD/xhtml1-transitional.dtd">
<html xmlns="http://www.w3.org/1999/xhtml"
      xmlns:h="http://xmlns.jcp.org/jsf/html">
    <h:head>
        <title>Facelet Title</title>
    </h:head>
    <h:body>
        Hello from Facelets
    </h:body>
</html>
In the "Configuration Files" (or "web/WEB-INF/") folder, there is a file called web.xml.
This web.xml file contains the following configuration information:
  <servlet>
      <servlet-name>Faces Servlet</servlet-name>
      <servlet-class>javax.faces.webapp.FacesServlet</servlet-class>
      <load-on-startup>1</load-on-startup>
  </servlet>
  <servlet-mapping>
      <servlet-name>Faces Servlet</servlet-name>
      <url-pattern>/faces/*</url-pattern>
  </servlet-mapping>
This tells the web server to handle any JSF requests using a special Servlet called FacesServlet.
Run the JSF application by right clicking on index.xhtml and clicking on Run.
NetBeans should open your browser to the following address:
http://localhost:8080/Week4/faces/index.xhtml
For what reasons might Facelets use <h:head> and <h:body> instead of just the html tags <head> and <body>?
Why is "/faces/" part of the URL in your browser?
In this exercise, we will create a simple workflow.
Create a new Facelet view named question.xhtml:
Enter the following code into the view for question.xhtml:
<?xml version='1.0' encoding='UTF-8' ?>
<!DOCTYPE html PUBLIC "-//W3C//DTD XHTML 1.0 Transitional//EN" "http://www.w3.org/TR/xhtml1/DTD/xhtml1-transitional.dtd">
<html xmlns="http://www.w3.org/1999/xhtml"
      xmlns:h="http://xmlns.jcp.org/jsf/html">
    <h:head>
        <title>Bad Advice</title>
    </h:head>
    <h:body>
        <p>Are you happy?</p>
        <p>
            <h:button value="Yes" outcome="yes"/>
            <h:button value="No" outcome="no"/>
        </p>
    </h:body>
</html>
Now create two more JSF Pages: good and morecats.
good.xhtml:
<?xml version='1.0' encoding='UTF-8' ?>
<!DOCTYPE html PUBLIC "-//W3C//DTD XHTML 1.0 Transitional//EN" "http://www.w3.org/TR/xhtml1/DTD/xhtml1-transitional.dtd">
<html xmlns="http://www.w3.org/1999/xhtml"
      xmlns:h="http://xmlns.jcp.org/jsf/html">
    <h:head>
        <title>Bad Advice</title>
    </h:head>
    <h:body>
        <p>It is good that you're happy.</p>
    </h:body>
</html>
morecats.xhtml:
<?xml version='1.0' encoding='UTF-8' ?>
<!DOCTYPE html PUBLIC "-//W3C//DTD XHTML 1.0 Transitional//EN" "http://www.w3.org/TR/xhtml1/DTD/xhtml1-transitional.dtd">
<html xmlns="http://www.w3.org/1999/xhtml"
      xmlns:h="http://xmlns.jcp.org/jsf/html">
    <h:head>
        <title>Bad Advice</title>
    </h:head>
    <h:body>
        <p>Get more cats.</p>
        <p>
            <h:button value="Ok" outcome="ok"/>
        </p>
    </h:body>
</html>
Save all files and run question.xhtml. Your browser should be opened to the following address:
http://localhost:8080/Week4/faces/question.xhtml
The page will render with several error messages. This is because JSF does not know how to handle the outcomes.
Create a new faces-config.xml file:
"faces-config.xml" should have appeared in your "Configuration Files" (or "web/WEB-INF") folder.
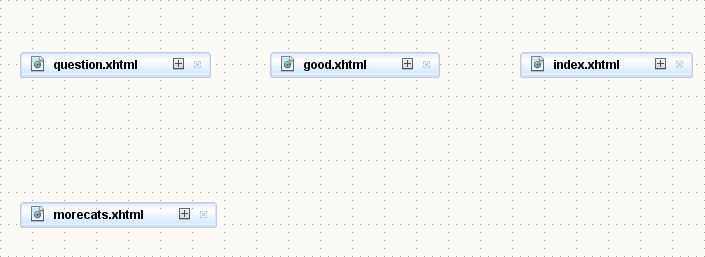
Open "faces-config.xml". At the top-left corner of the XML editor, there should be three tabs: "Source", "PageFlow" and "History".
Click on the PageFlow tab.
You should see a canvas that looks something like this:
Near the right side of each page icon, there is a small blue target. Use your mouse to drag a line from question.xhtml to good.xhtml. An arrow should appear from question.xhtml to good.xhtml. Double click on "case1" and rename the arrow to "yes" (without the quotes).
Draw additional navigation rules:
The result should look something like this:
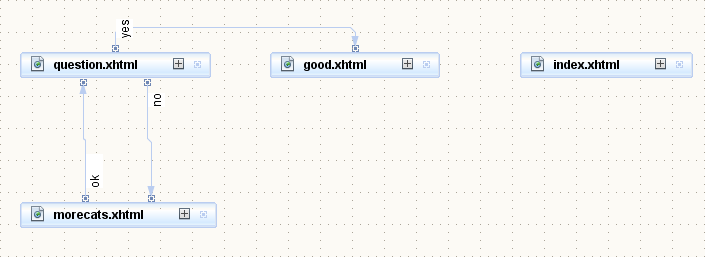
(The position of the pages does not matter. It is only important that you have the arrows going correctly from page to page.)
Ensure that all files are saved.
Now run the project again. Do this by right clicking on question.xhtml in the "Web Pages" (or "web") folder of your project and clicking on "Run File".
Your web browser should open to the following address:
http://localhost:8080/Week4/faces/question.xhtml
By clicking on the buttons, the JSF navigation should take you from page to page as defined in the navigation.
Why might it be useful to separate navigation from the page content?
In addition to the PageFlow in faces-config.xml, there is an implicit navigation rule for each view.
Consider this button:
<h:button value="Yes" outcome="yes"/>
The outcome can be replaced by the name of the target view:
<h:button value="Yes" outcome="good"/>
Now, modify all of your Faces files (good.xhtml, morecats.xhtml and question.xhtml) so that all the <h:button>s use the direct name of the target view.
When would it be better to use navigation rules in faces-config.xml and when would it be better to use direct navigation?
In this exercise we will use an action in a backing bean to control navigation.
Before we start, add another JSF file to your project, called "newgown" (i.e., newgown.xhtml).
Use this as the source of the file newgown.xhtml:
<?xml version='1.0' encoding='UTF-8' ?>
<!DOCTYPE html PUBLIC "-//W3C//DTD XHTML 1.0 Transitional//EN" "http://www.w3.org/TR/xhtml1/DTD/xhtml1-transitional.dtd">
<html xmlns="http://www.w3.org/1999/xhtml"
      xmlns:h="http://xmlns.jcp.org/jsf/html">
    <h:head>
        <title>Bad Advice</title>
    </h:head>
    <h:body>
        <p>Buy a new dressing gown.</p>
        <p>
            <h:button value="Ok" outcome="question"/>
        </p>
    </h:body>
</html>
A backing bean is a Java Bean that has been annotated with @Named.
JavaServer Faces uses the @Named annotation to refer to the backing bean by name.
By default the name of the bean is the same as the name of the class, where the first letter has been made lowercase:
MyBean will use name myBeanAnotherBean will use name anotherBeanQuestionController will use name questionControllerIn addition to the @Named annotation, you will need to introduce the relevant scope annotation.
The scope tells the application server how many instances to create and when to create them.
Here are some of the scopes you can use:
@ApplicationScoped: one instance of the bean is created for the entire application@RequestScoped: one instance of the bean is created per request@SessionScoped: one instance of the bean is created per user session@Dependent: a new instance of the bean created every time and in every expression that it is usedThere are other scopes, but we will not cover them here. Feel free to research on your own.
We will focus on RequestScoped as it helps understand the operation of JavaServer Faces.
Create a new Java class named "au.edu.uts.aip.advice.QuestionController":
Copy the following code into the Java file:
package au.edu.uts.aip.advice;

import javax.inject.*;
import javax.enterprise.context.*;

@Named
@RequestScoped
public class QuestionController {

    public String doSuggestion() {
        if (Math.random() < 0.5) {
            return "morecats";
        } else {
            return "newgown";
        }
    }

}
Note that the class is annotated by @Named and @RequestScoped.
Do you understand every line of code in this file?
Now, we will edit question.xhtml so that the action for the "No" button calls createSuggestion.
To do this, we need to replace the button with a commandButton (or a commandLink).
The commandButton currently looks something like the following:
<h:button value="No" outcome="morecats"/>
Change that line so that it now looks like the following:
<h:commandButton value="No" action="#{questionController.doSuggestion}"/>
There are three things to note here in JavaServer Faces:
QuestionController, so JavaServer Faces finds the backing bean using the name "questionController".questionController.doSuggestion, rather than questionController.doSuggestion()Finally, for the commandButton to work, it also needs to be inside a <h:form>.
i.e., your final file for question.xhtml should look something like this:
<?xml version='1.0' encoding='UTF-8' ?>
<!DOCTYPE html PUBLIC "-//W3C//DTD XHTML 1.0 Transitional//EN" "http://www.w3.org/TR/xhtml1/DTD/xhtml1-transitional.dtd">
<html xmlns="http://www.w3.org/1999/xhtml"
      xmlns:h="http://xmlns.jcp.org/jsf/html">
    <h:head>
        <title>Bad Advice</title>
    </h:head>
    <h:body>

        <h:form>

            <p>Are you happy?</p>
            <p>
                <h:button value="Yes" outcome="good"/>
                <h:commandButton value="No" action="#{questionController.doSuggestion}"/>
            </p>

        </h:form>

    </h:body>
</html>
Once again, right click on question.xhtml and click "Run File".
Whenever you answer "No", it should randomly choose between the two possible outcomes.
Note: Whenever you change your Java source code, you should right click on the project to choose "Clean". Then select your file and click run. This helps avoid errors that can sometimes occur when redeploying code over an already running project.
Carefully notice what happens to the URL in your browser whenever you click on "No". Does the content of the page match what is suggested by the URL? What does this tell us about JavaServer Faces?
In the backing bean, change the responses to include faces-redirect=true.
In other words, in QuestionController.java, replace lines that look like this:
return "morecats";
with lines that look like this:
return "morecats?faces-redirect=true";
(You should do it for both morecats and newgown)
Right click on the project to choose "Clean". Then right click on question.xhtml click run.
What happens now with the URLs in your browser when you click on "No"?
Undo those changes you made to the backing bean (i.e., go back to just returning "morecats" and "newgown").
Now, add new navigation rules to faces-config.xml:
<navigation-rule> for question.xhtml and in the navigation cases for morecats and newgown, add a <redirect/> element (this tag should go inside the <navigation-case> element).Your faces-config file should end up looking something like this:
<?xml version='1.0' encoding='UTF-8'?>
<faces-config version="2.2"
              xmlns="http://xmlns.jcp.org/xml/ns/javaee"
              xmlns:xsi="http://www.w3.org/2001/XMLSchema-instance"
              xsi:schemaLocation="http://xmlns.jcp.org/xml/ns/javaee http://xmlns.jcp.org/xml/ns/javaee/web-facesconfig_2_2.xsd">
    <navigation-rule>
        <from-view-id>/question.xhtml</from-view-id>
        <navigation-case>
            <from-outcome>morecats</from-outcome>
            <to-view-id>/morecats.xhtml</to-view-id>
            <redirect/>
        </navigation-case>
        <navigation-case>
            <from-outcome>newgown</from-outcome>
            <to-view-id>/newgown.xhtml</to-view-id>
            <redirect/>
        </navigation-case>
    </navigation-rule>
</faces-config>
Save any changes, and once again run question.xhtml.
What happens now with the URLs in your browser when you click on "No"?
Even though we have removed "?faces-redirect=true" from the outcome, Faces is still redirecting the responses so that the URL matches the content.
In this activity, you will build an app for restaurants.
When a restaurant is full, groups may be asked to wait for a table.
Their name and group size are collected and then they are seated in order of arrival.
In the remaining exercises for this week, you create a simple application to track a waiting list.
JavaServer Faces works best when combined with a database. Since we cover databases next week, we will use a simple static class that pretends to be a database.
First, we need to create a few files:
JavaServer Faces facelets:
Java classes in a package called au.edu.uts.aip.waitinglist:
You should be able to create the empty files in NetBeans yourself.
After creating the files, copy the following code into each of the files:
Group.java:
package au.edu.uts.aip.waitinglist;

import java.io.*;

public class Group implements Serializable {

    private int id;
    private String name;
    private int size;

    public int getId() {
        return id;
    }

    public void setId(int id) {
        this.id = id;
    }

    public String getName() {
        return name;
    }

    public void setName(String name) {
        this.name = name;
    }

    public int getSize() {
        return size;
    }

    public void setSize(int size) {
        this.size = size;
    }

}
WaitingListDatabase.java:
package au.edu.uts.aip.waitinglist;

import java.io.*;
import java.util.*;

public class WaitingListDatabase implements Serializable {

    // Helper to generate unique identifiers
    private static int idGenerator;
    private static synchronized int generateUniqueId() {
        idGenerator++;
        return idGenerator;
    }

    private static LinkedHashMap<Integer, Group> groups = new LinkedHashMap<>();

    public static Collection<Group> findAll() {
        return groups.values();
    }

    public static void create(Group group) {
        group.setId(generateUniqueId());
        groups.put(group.getId(), group);
    }

    public static Group read(int index) {
        return groups.get(index);
    }

    public static void update(Group group) {
        groups.put(group.getId(), group);
    }

    public static void delete(int index) {
        groups.remove(index);
    }

}
GroupController.java:
package au.edu.uts.aip.waitinglist;

import java.io.*;
import javax.enterprise.context.*;
import javax.inject.*;

@Named
@RequestScoped
public class GroupController implements Serializable {

    private Group group = new Group();

    public Group getGroup() {
        return group;
    }

}
WaitingListController.java:
package au.edu.uts.aip.waitinglist;

import java.io.*;
import java.util.*;
import javax.enterprise.context.*;
import javax.faces.context.*;
import javax.inject.*;

@Named
@RequestScoped
public class WaitingListController implements Serializable {

    public Collection<Group> getGroups() {
        return WaitingListDatabase.findAll();
    }

}
waitinglist.xhtml:
<?xml version='1.0' encoding='UTF-8' ?>
<!DOCTYPE html PUBLIC "-//W3C//DTD XHTML 1.0 Transitional//EN" "http://www.w3.org/TR/xhtml1/DTD/xhtml1-transitional.dtd">
<html xmlns="http://www.w3.org/1999/xhtml"
      xmlns:h="http://xmlns.jcp.org/jsf/html"
      xmlns:f="http://xmlns.jcp.org/jsf/core">
    <h:head>
        <title>Waiting List</title>
    </h:head>
    <h:body>
        <h:dataTable var="group"  value="#{waitingListController.groups}">
            <h:column>
                <f:facet name="header">
                    Group Name
                </f:facet>
                <h:outputText value="#{group.name}"/>
            </h:column>
            <h:column>
                <f:facet name="header">
                    Group Size
                </f:facet>
                <h:outputText value="#{group.size}"/>
            </h:column>
        </h:dataTable>
    </h:body>
</html>
newgroup.xhtml:
<?xml version='1.0' encoding='UTF-8' ?>
<!DOCTYPE html PUBLIC "-//W3C//DTD XHTML 1.0 Transitional//EN" "http://www.w3.org/TR/xhtml1/DTD/xhtml1-transitional.dtd">
<html xmlns="http://www.w3.org/1999/xhtml"
      xmlns:h="http://xmlns.jcp.org/jsf/html"
      xmlns:f="http://xmlns.jcp.org/jsf/core">
    <h:head>
        <title>Waiting List</title>
    </h:head>
    <h:body>
        <h1>New Group</h1>
        <h:form>
            <p>
                <label>Group Name:
                    <h:inputText value="#{groupController.group.name}"/>
                </label>
            </p>
            <p>
                <label>Group Size:
                    <h:inputText value="#{groupController.group.size}"/>
                </label>
            </p>
            <p>
                <h:commandButton value="Save"/>
            </p>
        </h:form>
    </h:body>
</html>
What is the purpose of the Group class?
The WaitingListDatabase is a very simple class with static methods to simulate a database. How would you use this class?
Right click on newgroup.xhtml and select "Run File" to open newgroup in your browser. What happens if you enter something that isn't a number into the group size field?
We will now create an action to save a group.
Modify newgroup.xhtml so that the commandButton has an action that refers to our GroupController:
i.e., <h:commandButton value="Save" action="#{groupController.saveAsNew}"/>
Now you should implement a method in GroupController.java that implements this action. The method should save the group to the database.
Our backing bean is request scoped (@RequestScoped).
This means that every time we request the view, a new instance of the bean is created.
In other words...
Initial Request
When we first open newgroup, the backing bean is created and the current values of the group object are used to display the form
i.e., JSF does something like this behind the scenes:
GroupController groupController = new GroupController(); // When the page is requested
Group group = groupController.getGroup();                // #{groupController.group}
String name = group.getName();                           // read #{groupController.group.name}
String size = Integer.toString(group.getSize());         // read #{groupController.group.size}
Form Submission
When we click "Save", another instance of the backing bean is once again created and JavaServer Faces stores the form values into the group object of our backing bean.
i.e., JSF does something like this behind the scenes:
GroupController groupController = new GroupController();      // A new instance when the form is submitted
Group group = groupController.getGroup();                     // #{groupController.group}
group.setName(request.getParameter("name"));                   // save #{groupController.group.name}
group.setSize(Integer.parseInt(request.getParameter("size")); // save #{groupController.group.size}
Your method to handle the action should be very short: get the current value of the group and pass it to WaitingListDatabase.create(group).
Now you should be able to open two browser windows:
Now you will modify the waitinglist.xhtml file so that there are links to add, edit and delete groups in the waiting list.
First, we will add a <h:link> to the bottom of the page (outside the <h:dataTable>) to open the newgroup page.
To create a link, use <h:link>.
A <h:link> is configured in exactly the same way as <h:button>.
It has a parameter called value that gives the caption to show and a parameter named outcome which is used for the navigation rules.
In fact, you can just use <h:button> in this exercise, if you wish.
Then you should modify your existing code so that when the user clicks "Save" on the newgroup view, they return back to waitinglist.
Next, you will need to create two new JSF views:
You should create both JSF view files. You can leave them with the default "Hello from Facelets" text. We will edit them later.
Return to the waitinglist view and add two new columns, each with a link that will edit or delete the row.
You should be able to figure out how to add two additional columns to the dataTable.
When you add the column, you should not use <h:outputText>.
Instead, make the value of the column be the <h:link>s that navigate to deletegroup and editgroup.
You will need to pass a parameter to these other pages to tell it what to edit.
Parameters can be added using an <f:param> child element.
For example:
<h:link value="Edit" outcome="editgroup">
    <f:param name="index" value="#{group.id}"/>
</h:link>
The above is equivalent to <h:link value="Edit" outcome="editgroup?index=#{group.id}"/>
Run your program to check that the links take you to the correct pages.
One way of passing parameters to backing beans using JavaServer Faces is with <f:viewAction> and/or <f:viewParam>.
Replace the contents of your editgroup.xhtml file with the following:
<?xml version='1.0' encoding='UTF-8' ?>
<!DOCTYPE html PUBLIC "-//W3C//DTD XHTML 1.0 Transitional//EN" "http://www.w3.org/TR/xhtml1/DTD/xhtml1-transitional.dtd">
<html xmlns="http://www.w3.org/1999/xhtml"
      xmlns:h="http://java.sun.com/jsf/html"
      xmlns:f="http://java.sun.com/jsf/core">
    <f:metadata>
        <f:viewAction action="#{groupController.loadGroup(param.index)}"/>
    </f:metadata>
    <h:head>
        <title>Waiting List</title>
    </h:head>
    <h:body>
        <h1>Edit Group</h1>
        <h:form>
            <p>
                <label>Group Name:
                    <h:inputText value="#{groupController.group.name}"/>
                </label>
            </p>
            <p>
                <label>Group Size:
                    <h:inputText value="#{groupController.group.size}"/>
                </label>
            </p>
            <p>
                <h:inputHidden value="#{groupController.group.id}"/>
                <h:button value="Cancel" outcome="waitinglist"/>
                <h:commandButton value="Save" action="#{groupController.saveChanges}"/>
            </p>
        </h:form>
    </h:body>
</html>
There are two things to observe on this page.
viewAction
The first is the
For this to work, you will need to add a new method to GroupController backing bean. The method should have one parameter (an integer). It should load the group from the database and store it as the group in the backing bean:
public void loadGroup(int index) {
    group = WaitingListDatabase.read(index);
}
inputHidden
The <h:inputHidden> is also important.
Its purpose relates to a subtle point.
The viewAction is only used when the view is first requested (i.e., by a GET request).
When you perform an action on the page (i.e., a POST request caused by submitting the form), the viewAction is NOT called.
So, in order for the id of the waiting group to be remembered during the "Save", we need to store it as a hidden value in the form.
When you first request the page, JavaServer Faces will do something like this behind the scenes:
GroupController groupController = new GroupController(); // When the page is requested
groupController.loadGroup(Integer.parseInt(request.getParameter("index"));  // perform the viewAction
Group group = groupController.getGroup();                // #{groupController.group}
String name = group.getName();                           // read #{groupController.group.name}
String size = Integer.toString(group.getSize());         // read #{groupController.group.size}
int id = group.getId();                                  // read #{groupController.group.id}
When you click "Save", JavaServer Faces will do something like this behind the scenes:
GroupController groupController = new GroupController();      // A new instance when the form is submitted
Group group = groupController.getGroup();                     // #{groupController.group}
group.setName(request.getParameter("name");                   // save #{groupController.group.name}
group.setSize(Integer.parseInt(request.getParameter("size")); // save #{groupController.group.size}
group.setId(Integer.parseInt(request.getParameter("id"));     // save hidden #{groupController.group.id}
Now, you should be able to implement the action for the "Save" button. The method should have very few lines of code.
Run your application and check that it is working.
Now, modify deletegroup.xhtml (and create appropriate actions in the backing bean) to delete your object.
Hint
On the deletegroup.xhtml form you are not accepting user input.
You will show the current value of the group.
You will only delete the group when the user has confirmed the action.
Instead of using h:inputText to create an input field, you can use h:outputText to show the current value.
We have covered a lot of ground. It is okay if you feel overwhelmed.
At this point, you should be able to summarize the process of handling a JavaServer Faces request. When is a new backing bean created? How and when are new instances of Group created?
We have a method called getGroup() on the backing bean.
In JSF we access properties using #{groupController.group.name}.
If, instead, we had a method directly on the backing bean called getName(), then in JSF we could use an expression such as #{groupController.name} (no need for the .group).
Why have we used this level of indirection? Why not just use setters and getters on the backing bean?
Finally, we will add validation to our application.
We would like to ensure that the user enters a name for the group and that the group size is between 1 and 20.
Add Validation Annotations Validation rules can be added, simply by annotated properties of a bean. For example, a minimum and maximum age on a Person bean might be enforced using the following annotations:
@Min(0)
@Max(130)
public int getAge() {
  return age;
}
There are many validation constraints available: http://docs.oracle.com/javaee/7/api/javax/validation/constraints/package-summary.html
We will edit Group.java to add appropriate constraints:
import javax.validation.constraints.*;@Min(1) and @Max(20) to the getSize method.@Size(min=1) to the getName method.This is all we need to do!
Now return to the application and run it!
The error messages shown are not particularly user friendly. They can be modified by creating your own validators (advanced!) or adding attributes to the components on your Faces page.
You can set a custom error message using attributes on your Faces page by modifying your input fields as follows:
<h:inputText value="#{groupController.group.size}" validatorMessage="Please enter a group size between 1 and 20" converterMessage="You must enter a valid number"/>
The red error messages that appear at the bottom of your pages is actually a debugging feature of JavaServer Faces. In practice, you should tell JSF where the error messages should go.
To tell faces where to put the error messages, use the following element:
<h:messages/>
To put individual messages next to their field, you should do as follows:
<h:inputText id="size" value="#{groupController.group.size}" validatorMessage="Please enter a group size between 1 and 20" converterMessage="You must enter a valid number"/>
<h:message for="size"/>
Validation constraints are annotations on the Group class (as opposed to being stored in the presentation logic or controller). What are the advantages and disadvantages of this?
In a previous "Reflect" exercise, you were asked why we have the indirection: why use #{groupController.group.name} when we could use #{groupController.name}?
How is validation relevant to that question?
This has been a whirlwind tour of JSF!
Congratulations on making it this far! You've achieved a lot and you should be proud of how far you've come in just four weeks.
We'll be using JavaServer Faces throughout the course. If you don't 100% understand everything right now, don't panic. You'll continue learning as you put JSF into practice.
Having completed all the exercises, you may like to spend some more time exploring the features of JavaServer Faces.
Here are some ideas to explore:
Facelets Composition
Composition can be used to create templates.
http://www.jsftoolbox.com/documentation/facelets/10-TagReference/facelets-ui-composition.html
Converters and Customer Converters
Different JSF scopes
Instead of @RequestScoped, try @SessionScoped. What can you do with a session scoped bean that is difficult with a request scoped bean?
PrimeFaces
PrimeFaces provides many useful components that you can use in a Facelet. You can see a showcase here: http://www.primefaces.org/showcase/
To add PrimeFaces 5.0 to your project: